I have been working with resin for the past year as an avenue for artistic expression, experimenting with various ready-made silicone molds purchased online and at craft stores like Joann Fabrics or Michael’s. Epoxy A and B resin is fun and easy to work with, can be mixed with colorful acrylic inks and mica powder, and embedded with materials like small stones, flowers, or even plastic waste from the ocean. A quick Google search reveals a treasure trove of project ideas, video tutorials, and sample works of art.


This past month, Celeste Moreno from CU Boulder shared her creative work using silicone molds and 3D prints designed from code to cast edible works of art. You can read more about her project here.
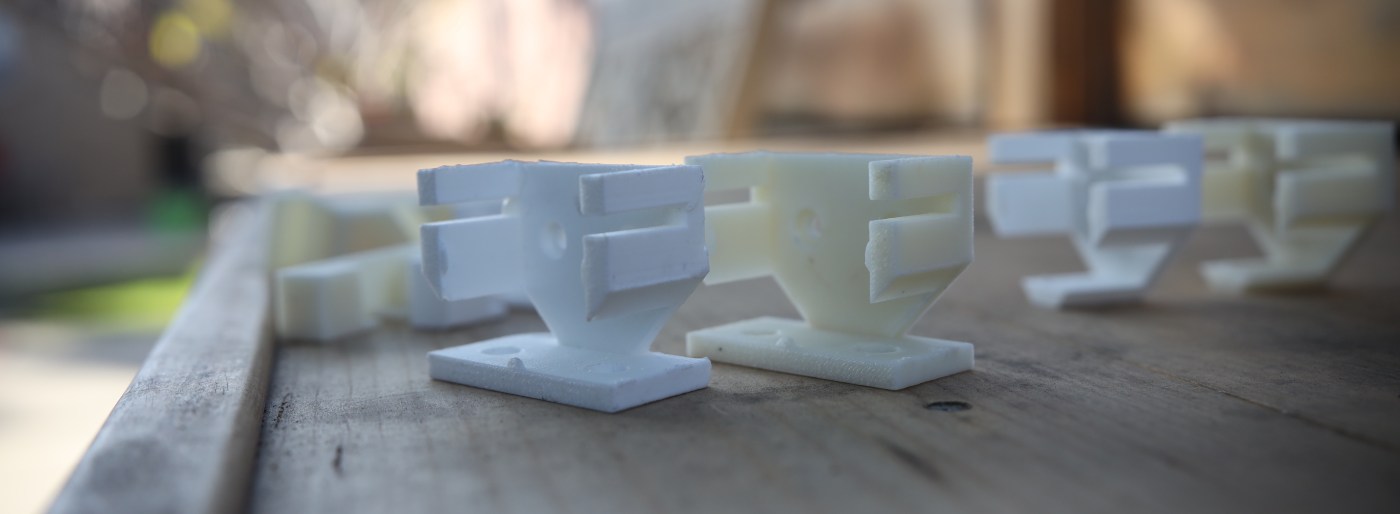
Inspired by Celeste’s work, and motivated by an upcoming class project, I set out to explore silicone mold making. Starting with an original 3D print designed in Tinkercad, in this case mounting brackets to hold servo motors, I used Smooth-On’s OOMOO 30 silicone to make my first mold.
Fortuitously, the package I ordered also came with Smooth-Cast 300 liquid plastic compound, a fast curing resin product. Accustomed to waiting a day for the epoxy resin to cure, I was surprised to discover that Smooth-Cast 300 takes one minute to mix and about 8 minutes to cure. In practice, I give it about 20 minutes for full curing, which is much faster than epoxy resin and becomes a viable in-class activity.
Similar to A and B resin, the silicone is composed from two equal parts. In the case of Smooth-On products, the parts are pink and blue, so when completely mixed, the silicone turns purple.


After approximately four hours, the silicone is cured and ready to release the original 3D printed part. Although the video below is for a different component, you can see what the release process looks like.
With the silicone mold ready, it is time to mix the liquid plastic (resin) and pour the compound into the mold.
Within minutes, the resin turns white and begins to cure. I wait about 20 minutes before releasing the new replicas. The final pieces are a bit rough around the edges so a little sanding or work with an x-acto knife cleans them up. I have also benefited from the use of a plastic platform on the bottom of the mold so that the results turn out flat rather than needing to cut away the impressions made from the LEGO circles.
I have since made a number of molds for our upcoming project using Hummingbird Robotics components. I look forward to future experiments with mold making and casting.
Materials List:
- Smooth-On OOMOO 30 Silicone and Smooth-Cast 300 Liquid Plastic
- Graduated Mixing Cups to stir silicone and liquid plastic
- Craft sticks, for stirring
- Disposable Nitrile gloves
- Toothpicks, for taking out any bubbles
- LEGO bricks and platform to hold the mold
- Dust protection mask


