We often hear about an Invitation to Play as an open-ended hands-on activity used mostly in preschools, or at least among younger age children. This concept, inspired by the Reggio Emilia approach to teaching, “encourages children to learn through exploration, by providing materials that ‘invite them to play’ in a creative, non-directive way, with no criteria for success.” ¹
The middle school science teachers in my school value the importance of this approach and use it regularly with our pre-teen and teenage students. They often open a class session with an Invitation to Play, using a variety of materials for building, exploring, designing, and testing.
Last month, I decided to bring an Invitation to Play into my own work with the middle schoolers, and into a few adult learning situations as well. I paired an Invitation to Play with another concept I enjoy…marble runs. These two concepts combined in a way that would allow students to construct something together to test and play while implementing an unlimited variety of configurations.
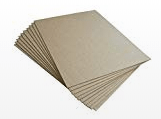 The material I chose for making the marble run ramps was light weight chipboard. I am experimenting with this medium as an alternative to cardboard for student projects and prototypes for its firmness yet flexibility. Corrugated cardboard is a wonderful prototyping material in most situations, and I use recycled cardboard whenever possible. However, in some circumstances, there is an advantage to having a thinner material for working with small objects. In this case, chipboard is a better fit.
I wanted to create a few starter templates for the students to test out, so I designed ramps, curves, and buckets that could be laser cut, then assembled during the activity using glue or masking tape. Part of the enjoyment and engagement during the Invitation to Play is what students do with the pieces. How do they interpret the folds and connections? What is each piece used best for? How do the pieces work together?
Below is a photo of those pieces on the marble run wall, using neodymium magnets to stay in place.

Regarding the wall, it is made from left over 2″ x 2″ furring strip board, and a thin piece of sheet metal, 2′ x 3′. I cut grooves into the wood (to accommodate the sheet metal) using a table saw, then cut the lengths at 45 degrees to join at the corners. A few brad nails, wood glue, and some caulking to keep the sheet metal in place, and the wall is ready. I have prior experience building larger walls like this, but find that this small size is perfect for placing on a table for students to use. It’s two-sided, so different groups can work on either side, or even collaborate to get a marble to travel on both!
As is often the case with me when I start a new project, I tend to go down the rabbit hole. After making two different ramps, I decided to create a few more, and a few more. My original intention was to offer just a couple of ideas and allow students to hand design and cut their own pieces from chipboard during the activity. While I did leave this latter option open to them, I created more than a few different types of pre-cut ramps.
The Invitation to Play was engaging for middle schoolers and adults alike. I used the activity in two different professional development workshops and during a school event called Grandparents and Special Friends Day where students and adults worked together. We did, in fact, have one group that made the marble travel from one side of the wall to the other, using custom made ramps.
The following is a list of the materials, including downloadable templates that you can try out for yourself.
The material for the wall:
- 2″ x 2″ furring strip board
- 2′ x 3′ sheet metal
- Fasteners (nails or screws)
- Wood glue for added stability
- Caulking to place between sheet metal and wood to get a tight fit
The material for the ramps:
- Light weight chipboard
- Small neodymium magnets
- Tape or glue for assembly (I use wood glue)
- Ramp templates ONE and TWO for laser cutter
- 14mm marbles
And here are photos of the Invitation to Play:
")
")
")
")
")


If you decide to make a marble run with these templates, I would love to hear from you. If you have done something similar with your students, I’d like to hear about that too! Please feel free to leave a comment below.

Leave a comment