Our sixth graders are finishing up their work on the Legends of the Trash Creatures project. This interdisciplinary, environmentally focused project tasks students with (among many other requirements) the creation of a 5′ tall creature made of trash and embedded with Hummingbird Robotics to allow it to sense the environment and react with sound, lights, and motion.
Now in our second year of this project, we have learned some of the pain points our students encounter in the building of their creatures. In particular, they run into issues when attaching the electronic components securely and as damage-free as possible. Given that we work in a maker lab, it seems logical that we should be inventing and fabricating the solutions to these design challenges.
I previously wrote about the small 3D printed LED covers students use in a variety of projects to diffuse the often overly bright light emitted from an LED. While these LED caps work well with the Trash Creatures, students also need to mount items such as distance sensors, servo motors, and the Hummingbird board.
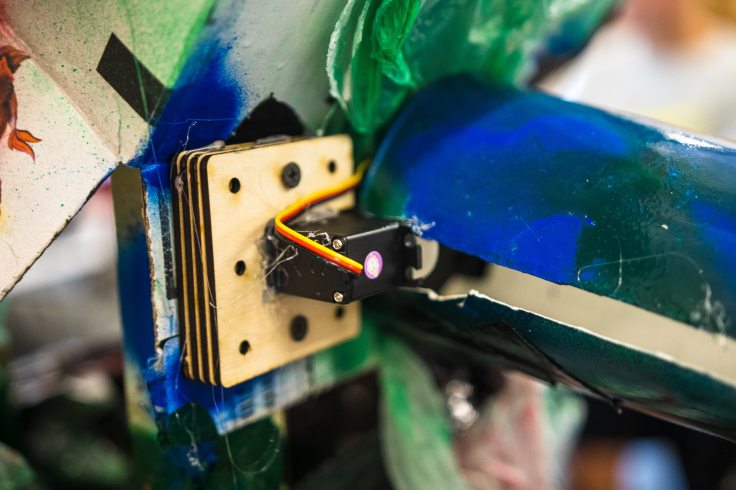
Using a 2D vector design program like Adobe Illustrator, or the web-based Gravit Designer, it’s a fairly straight-forward task to mock up a quick idea using measurements from our Hummingbird parts. After a few test runs on the laser cutter, and slight modifications here and there, we developed a wooden plate upon which students now mount their boards. Below you can see the mount getting attached to a creature frame, and the Hummingbird board then attached to the mount.
")
")
The wonderful benefit of a fabrication lab is the ability to rapid prototype, make changes based on usage, and print out a new version as many times as needed. Using low cost materials like craft wood, we can design and test solutions quickly and frequently.
A similar method and materials were used to create the supports seen below for our servo motors. I suspect there will be a number of design changes in the years ahead as we encounter new situations and design obstacles.
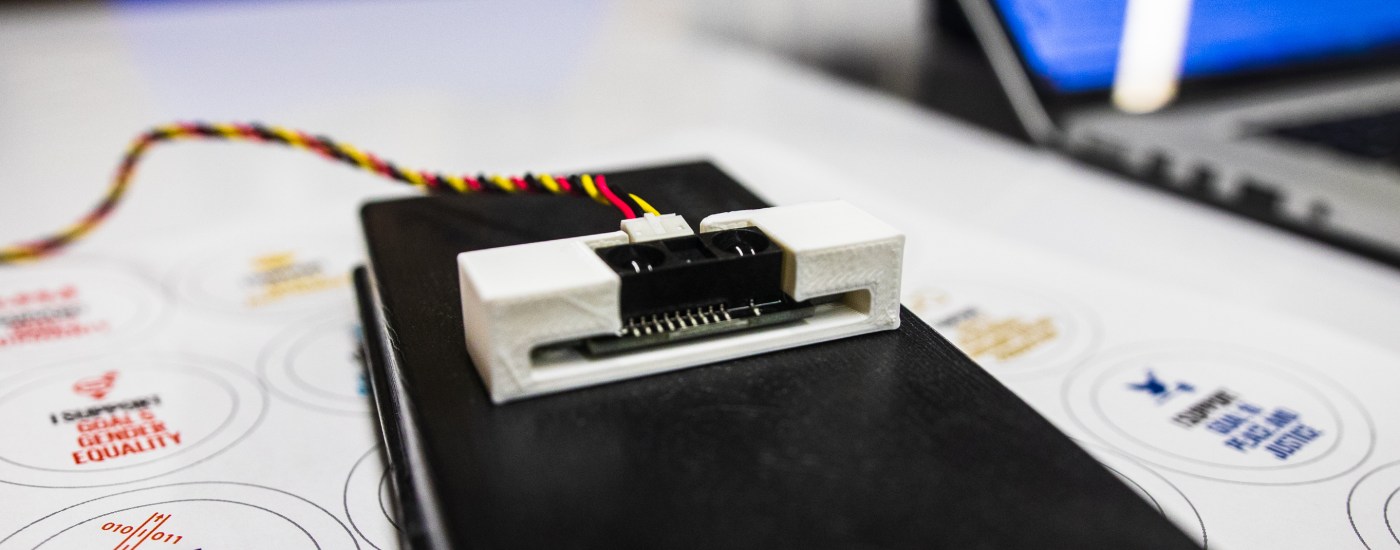
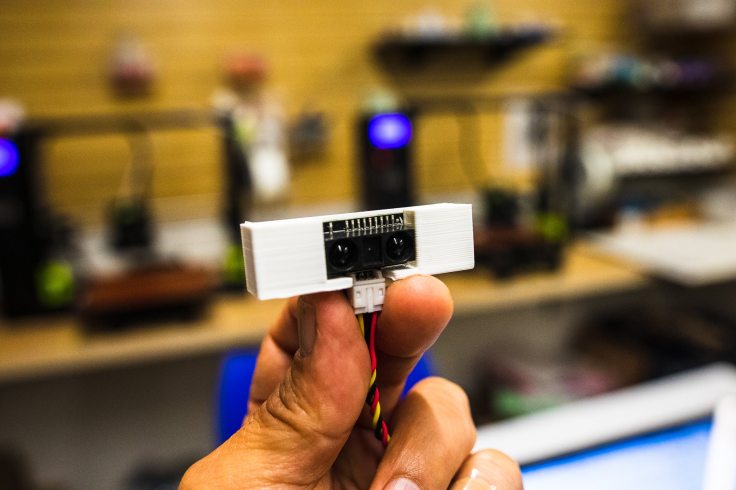
Today, I noticed one creature that required its distance sensor to be placed in an awkward position. In this particular scenario, 3D design seemed a more appropriate tool. With a few minutes on Tinkercad and three test prints, a distance sensor mount was designed and ready to go. Below is a photo of the distance sensor mount, which I have posted on Thingiverse.
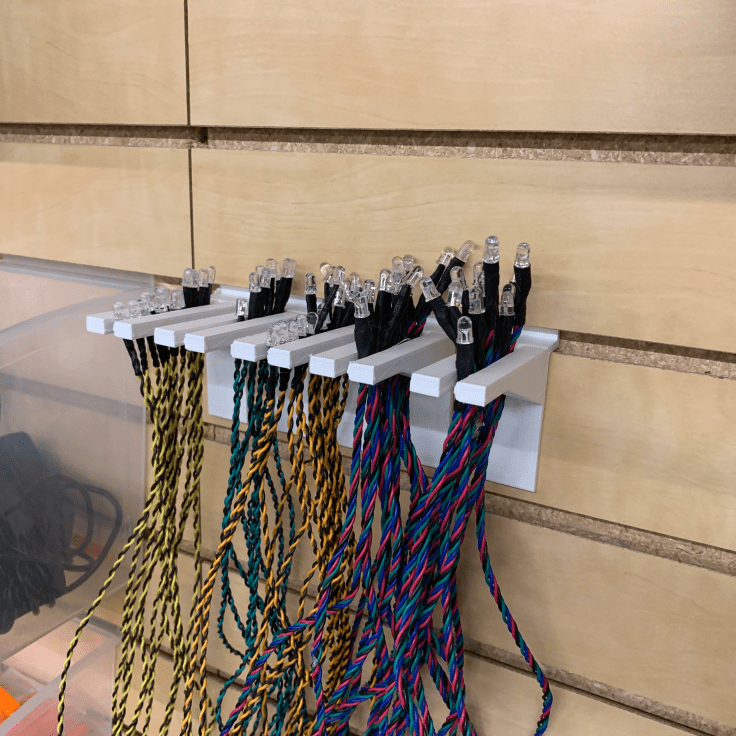
Finally, I continue to work on the best ways to store electronic components on our slat walls such that they are visible, easy to access, and decently organized. I will post these on Thingiverse in the near future once they are “ready for prime time.”
Have you designed your own parts and accessories to work with existing materials in your classroom? I would love to learn about your work. Please feel free to leave comments below.

Leave a comment