This has been a whirlwind Labor Day weekend. Not just because I have been printing and resin casting nonstop to get the Pocket Document Camera ready for our students and teachers, but because the conversation regarding it just blew up on Twitter, in a great way.
What an amazing, thoughtful, kind, and collaborative world we can choose to live in and be a part of. The responses have been overwhelming, in the form of positive feedback, but more importantly in new ideas and problem solving.
I have compiled all the essential information here to serve as a one-stop shop to find what you need. I will continue to update as needed.
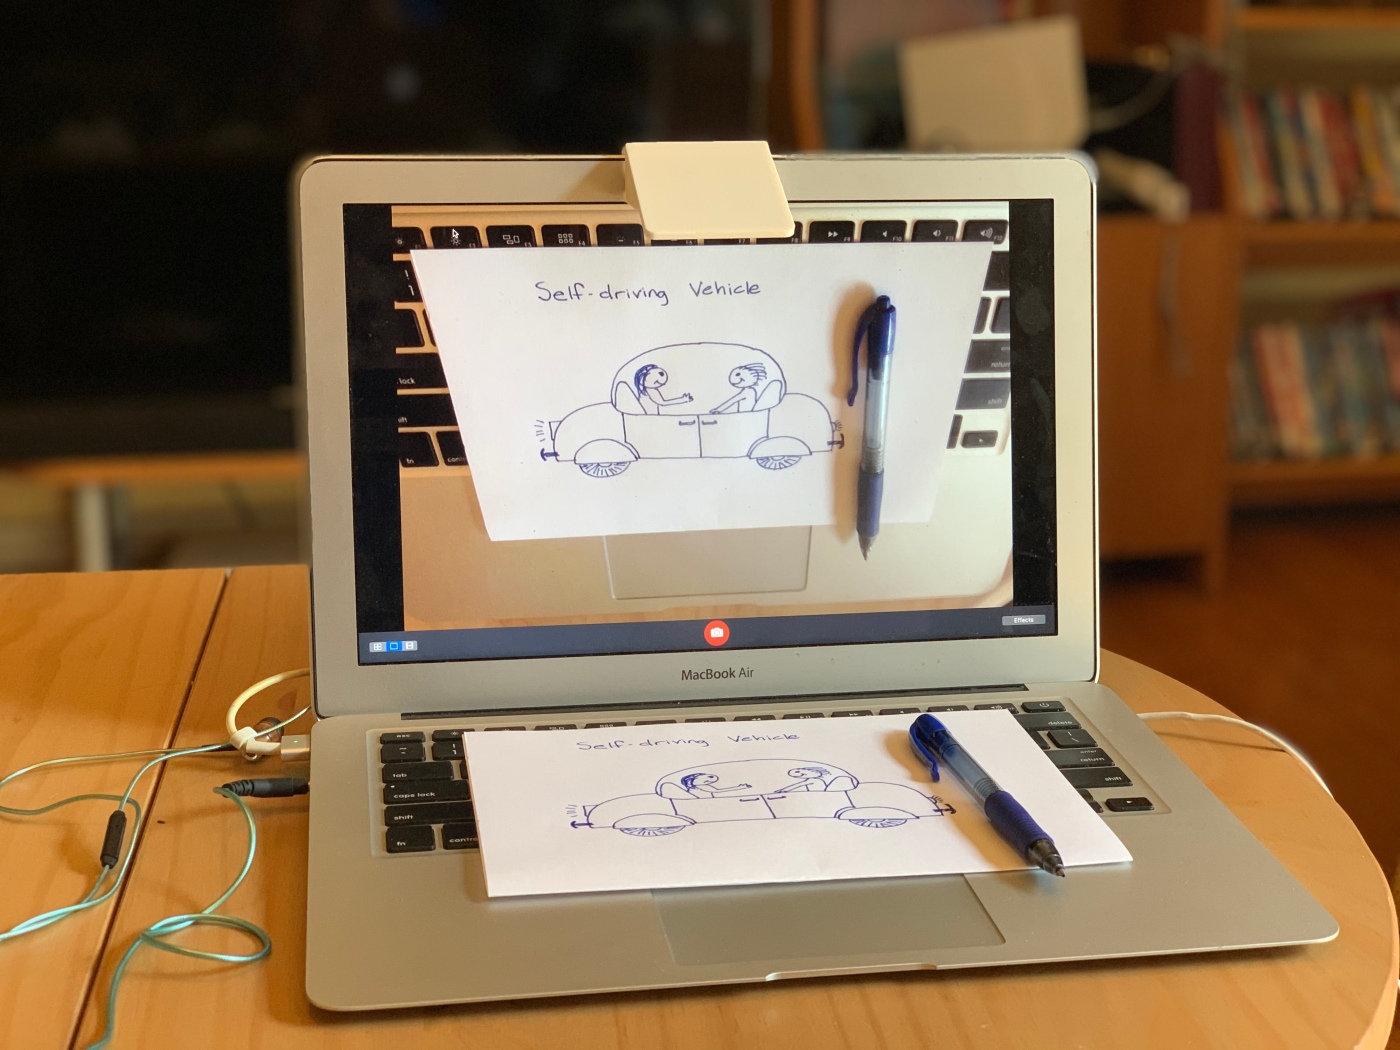
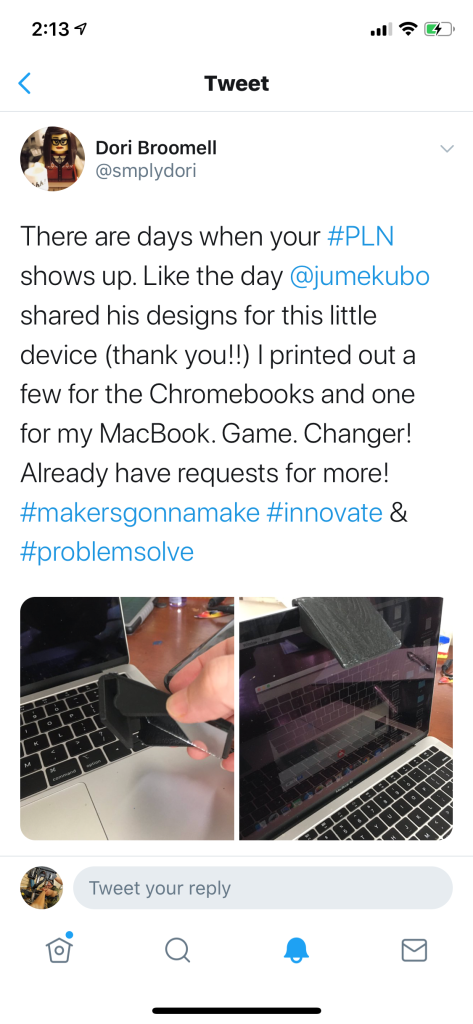
The Pocket Document Camera is simple. Essentially, it’s a mirror to project the computer’s camera down to see the keyboard and view anything you place on it. Our main motivation for creating this was that the math department needed a way for students and teachers to show hand-written work while learning remotely. Sharing work has been challenging, particularly when much of that work is on paper. The Pocket Document Camera helps to resolve these issues by allowing students and teachers a simple method for showing work and demonstrating concepts over Zoom.

The Files and Materials
My current 3D print and 2D laser cut files can be seen on Thingiverse here. There is a growing list of versions available for different laptop lid sizes, with contributions from other makers in the last few days.
- Michael Johnson (@mcdanlj) riffed on the original to create an adjustable version that allows you to flip the mirror up when not in use. His version can be seen here.)
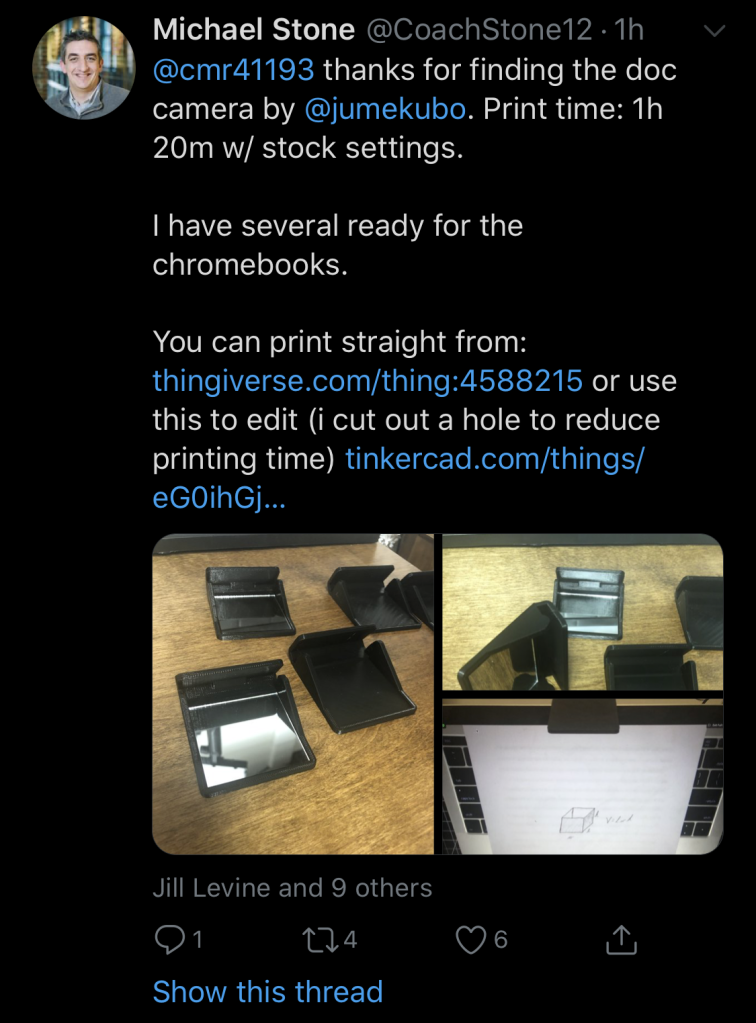
- Michael Stone (@CoachStone12) has created a slightly modified version of the Macbook Air/Pro version to speed up the printing. His version can be seen here.
- Jeremy Macdonald (@MrMacnology) created a flexible version out of PETG that fits just about any sized laptop lid. His version can be downloaded here.
- Diego Fonstad (@lectrifyit) created a see through model that you add a CD to for reflection. His version can be downloaded here. Such a great option when mirrors aren’t readily available.
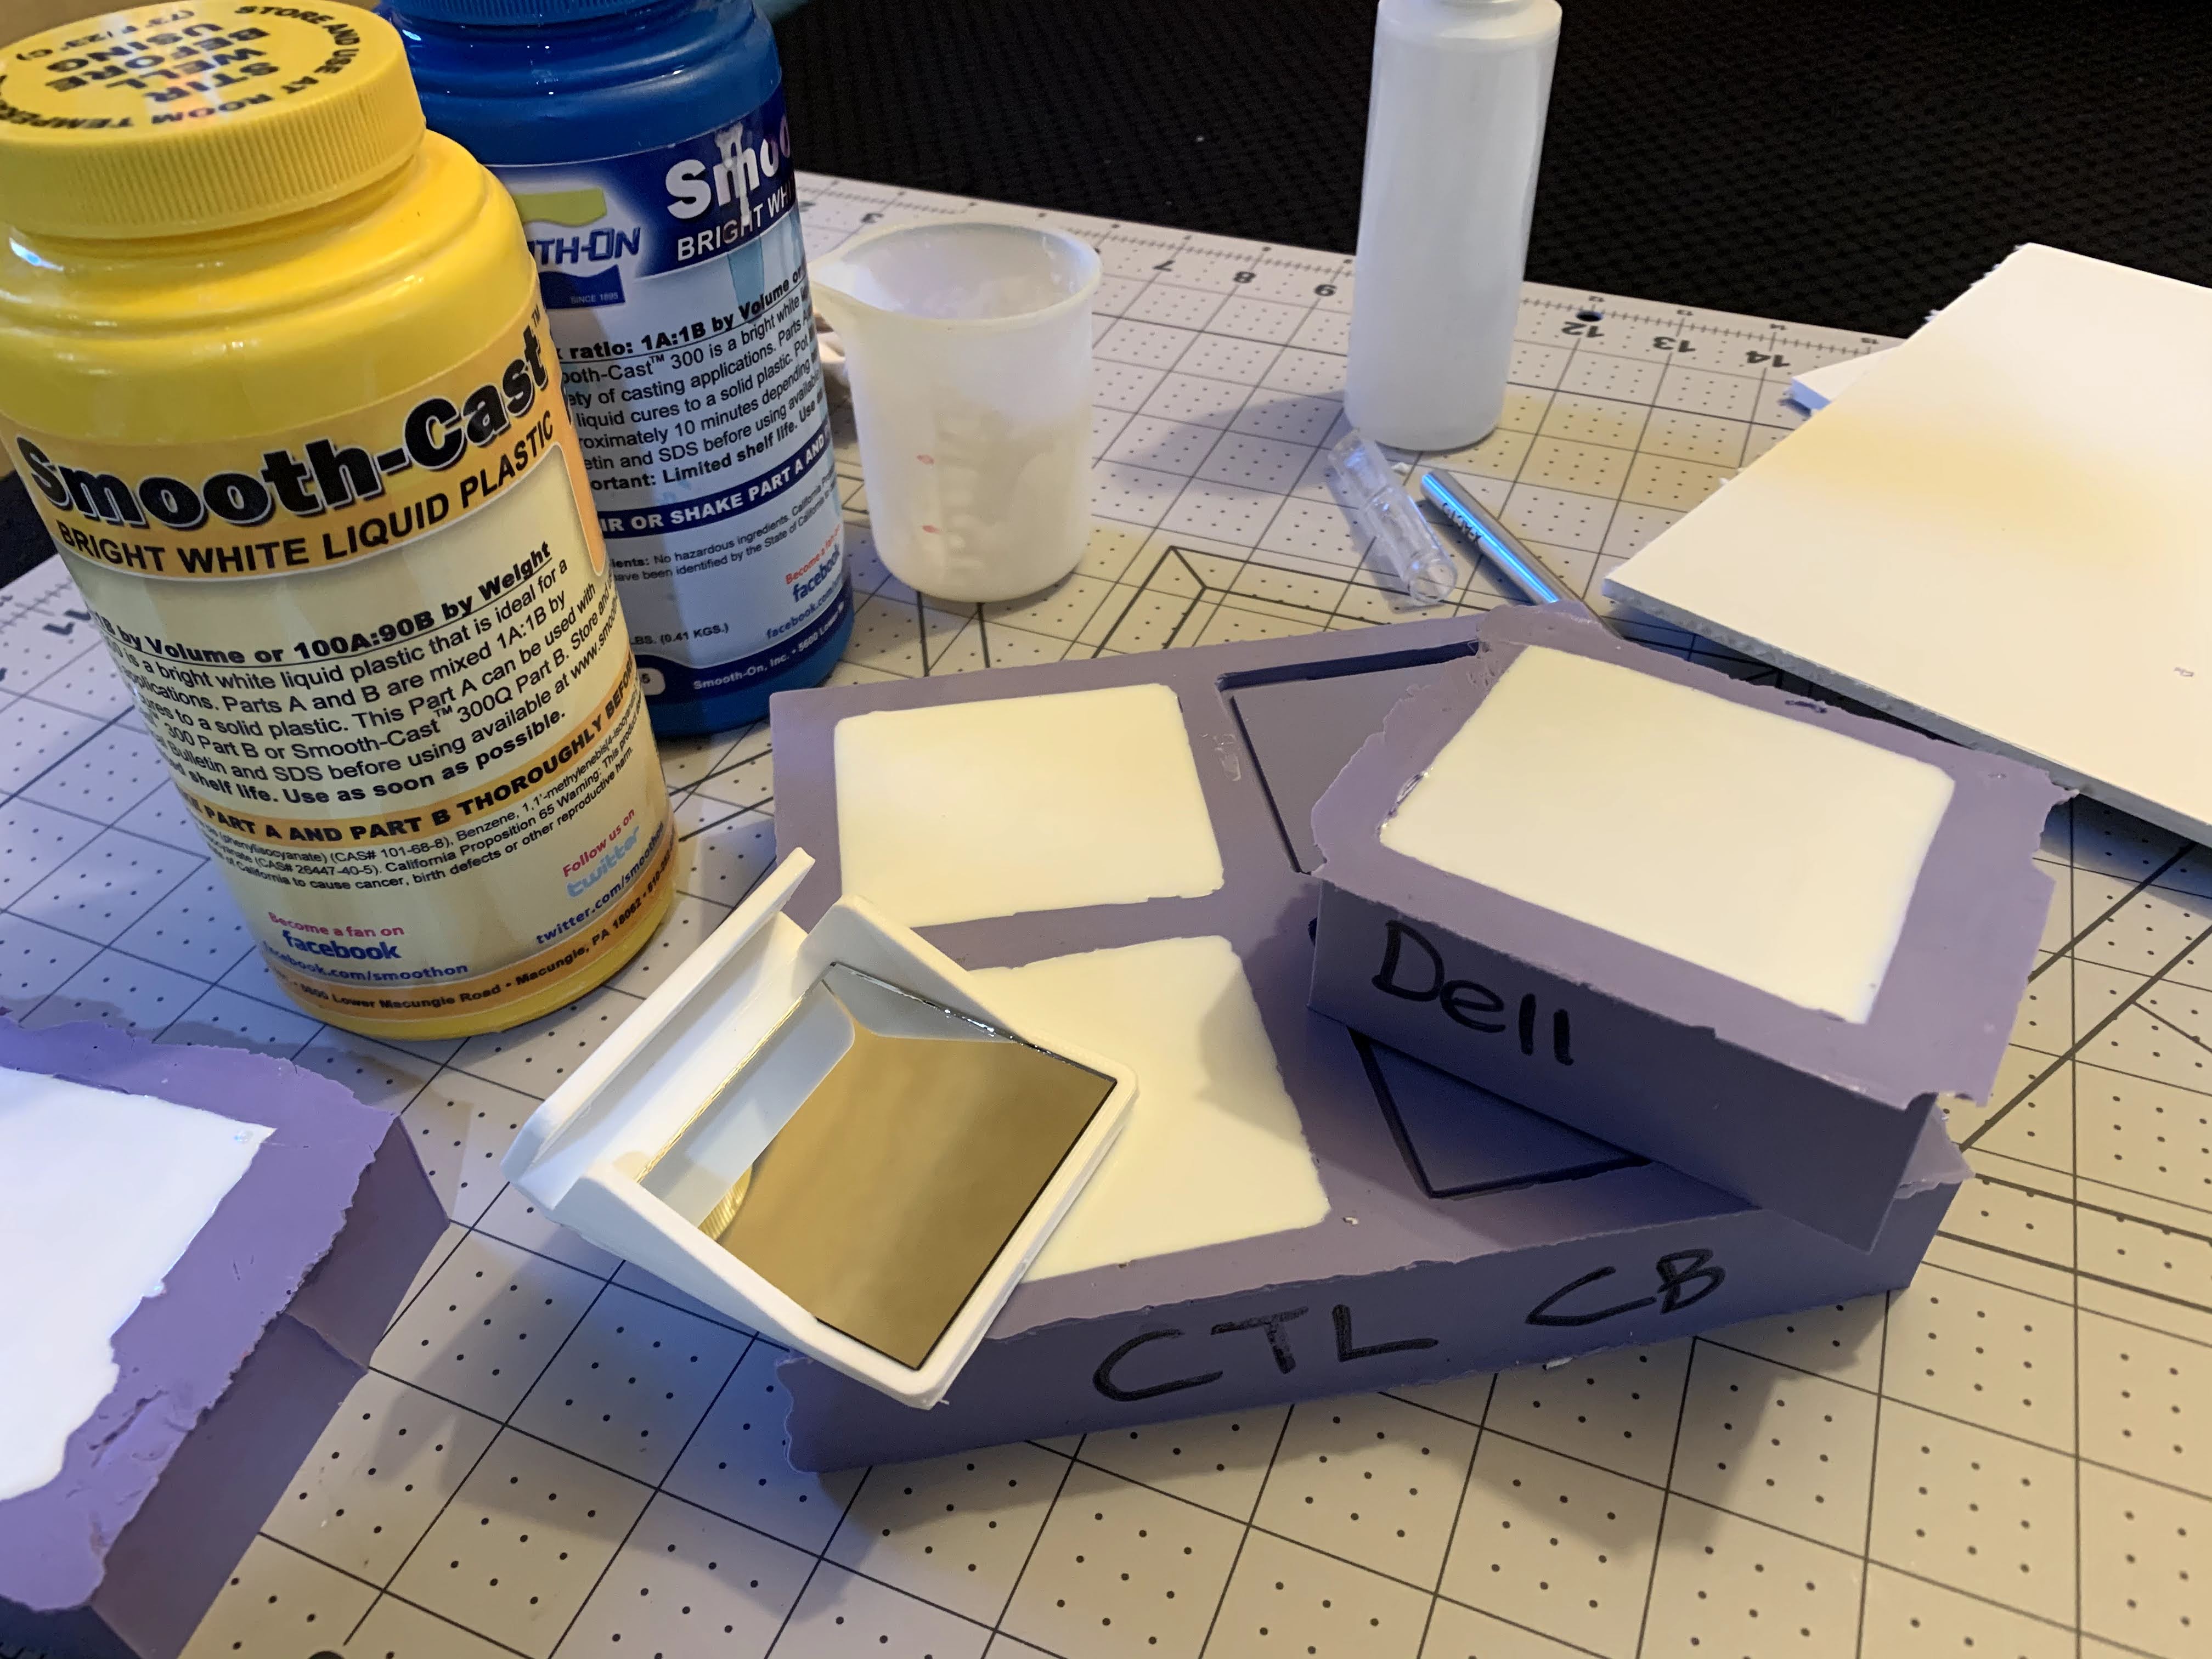
In addition, I have a PDF file that can either be laser cut, or applied over chipboard/cardboard to be cut and assembled by hand.

For chipboard, I used this medium weight version. The mirrors for all models are 2″ square, which I found on Amazon. They are fastened on the base with double-stick foam tape.
If you don’t have access to a 3D printer or laser cutter, or just want to buy, please note that there is a similar product on the market from Ipevo called the Mirror Cam. As of this writing, they were back ordered, but hopefully will be available again soon. I really love the design of this model, as it folds up neatly when not in use. People on Twitter have also stated that the Osmo Reflector can do similar work.
Reverse Image in Zoom and other Platforms
By default, when using the Pocket Doc Cam with Zoom, the image on camera is reversed for the participants. While things look normal for the person presenting, it’s a mirror image for everyone else. In most cases, this isn’t such a big deal, but it is problematic when writing is involved. There are a few options for correcting this.
The fine details regarding these options are documented here.
Option 1: Use your built-in camera and share that as your screen
Open your default camera app. It will have the correct orientation for you. While in Zoom, as you screenshare, select this app as the window to show. What you see on your screen is what your participants will see.
Option 2: Make a few changes in Zoom Settings
There are two settings that need to be adjusted in Zoom, and the result is that you share your screen to show your video. Here are the complete directions to set up Zoom in order to do this. A huge thank you to Patrick Leiser for bringing this knowledge to my attention.
Option 3: Use a third party tool, like ManyCam and Ipevo
I saw ManyCam demo’d a couple of months ago for the purpose of switching between different video sources while live streaming. It is a handy piece of software, one I will definitely use in the future. What I didn’t know at the time, however, is that you can flip the screen on this video source and stream it over Zoom, thereby fixing the mirror image. To learn more about using ManyCam with Zoom, see this page.
Ipevo offers the Visualizer software for both Win/Mac and as a Chrome extension. Within this app, you can keystone correct, to make the image look as square and flat as possible.
For other platforms: Google Meet, Microsoft Teams
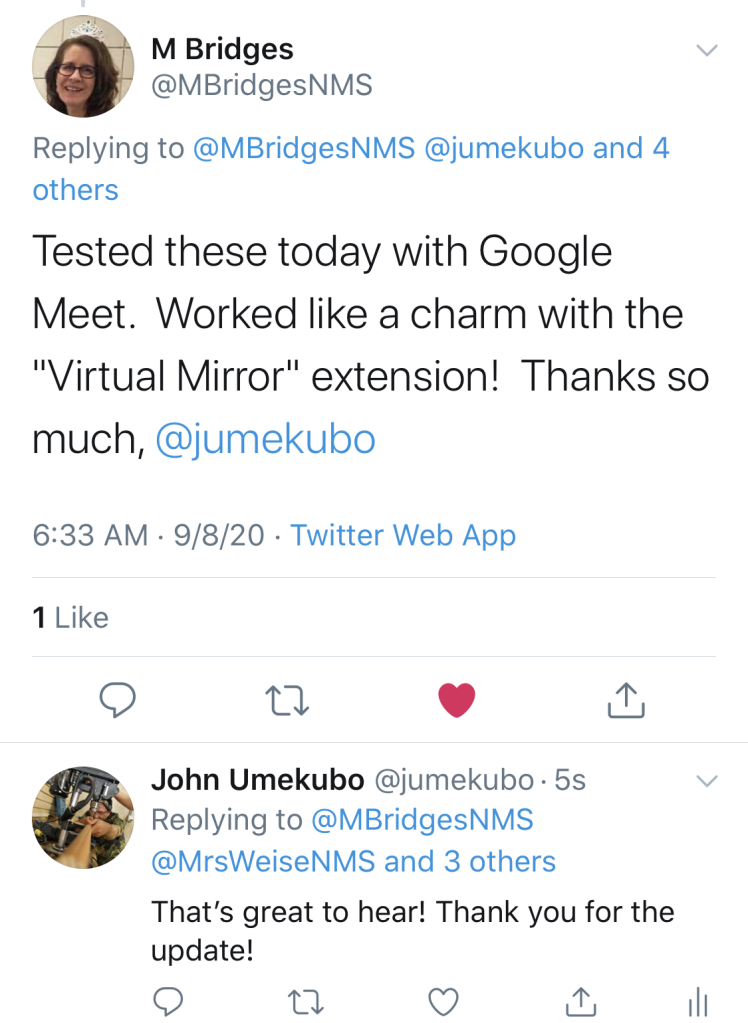
Option #1 above should work for Meet and Teams as well, but I have not personally tested. There are others testing out solutions for Google Meet and Microsoft Teams. @MBridgesNMS shared that she used the VideoMirror Chrome Extension with Google Meet and found success. As far as I can tell, Microsoft Teams can interface with ManyCam.
Flipgrid
If you are a Flipgrid user, this platform has a built-in feature to mirror any video that you want to upload. See instructions here.
Writing Above the Keyboard
As many pointed out from my first post, sharing an image is good, but what about writing live on camera? How can you do this well on top of the keyboard? The simplest solution is to create a small table that can lay on top of the keyboard as seen below.
I made the table just large enough to cover the keyboard and have room for “legs” in each corner. The legs are actually left over foam from packaging used in the mirrors I purchased.
To add a bit more utility, I used dry erase sticker paper to turn the table into a whiteboard.
When thinking about what students could build at home for a table, using materials they find laying around, this could be a fun and engaging dive into Design Thinking and product development. There are lots of opportunities for creativity here.
Don’t Let 3D Printing Slow You Down
When 3D printing isn’t fast enough to get that class set printed, consider creating a silicone mold of the original 3D print, then cast it using quick-drying liquid plastic (resin). I have written previously about this process, and youtube videos abound with tutorials and creative ideas for resin and mold making. It takes about 20 minutes to cure and I have created molds with four units each.
The Collaborative Potential in Social Media
I’ll end by stating that one of the most rewarding gifts from this entire experience has been the conversation generated across the globe. People from Canada, to Argentina, to France, to Jakarta and beyond, have chimed in, shared videos, offered advice, solved problems, and sent good wishes. I am blown away, humbled, and inspired. Thank you to everyone, more than I can name here, for your contributions to this page and to this process.


Thanks, John, for the inspiration! You really started an international fire going here, and this idea is going to help educators and others around the globe. It sure met a personal need for me, to help my wife teach math.
The past few days of rapid iteration on prototypes for the articulated lid DocuCam design have been fun and rewarding, and now I have almost 60 mirrors that I don’t need, and have offered to make into DocuCams for local students and teachers.
LikeLike
So awesome to hear, Michael. Thank you for your work in this process and for bouncing ideas back and forth. It’s been fun and now it’s a matter of getting these into the hands of students and teachers!
LikeLike
I was asked how to measure the screen thickness, so I created a printable gauge that slides over the top and lets you read the thickness of the screen on the gauge.
I recently had a few commenters on thingiverse ask me to provide separate files for the clips and the mirror holder, so I have also added separate clips for each size and separate mirror holder (which is the same part regardless of clip size).
All those parts are available at thingiverse and youmagine as well as github.
https://www.youmagine.com/designs/docucam-laptop-document-camera
https://www.thingiverse.com/thing:4590755
https://gitlab.com/mcdanlj/docucam
LikeLike
Michael, this is excellent! Thank you for the update and the links. The iterative work has made your model even more accessible to everyone.
LikeLike
I have been working on a clip-on document camera this whole summer. Most school districts are using a wide range of devices. My students all have different devices, so I designed a clip-on that works with them all. Here is a link to my instructable:
https://www.instructables.com/id/3-Clip-on-Document-Camera/
Clip-ons work better if the mirror is closer to the camera. Front surface mirrors reduce distortion, but regular mirrors work ok. Acrylic mirrors can be custom cut at Tap Plastics for around $2 each.
LikeLike
This is excellent, Andres! Thank you so much for sharing your great work!
LikeLike
Most school districts are using a wide range of devices. My students all have different devices, so I designed a clip-on that works with them all. Here is a link to my instructable:
https://www.instructables.com/id/3-Clip-on-Document-Camera/
Clip-ons work better if the mirror is closer to the camera. Front surface mirrors reduce distortion, but regular mirrors work ok. Acrylic mirrors can be custom cut at Tap Plastics for around $2 each.
LikeLike
I found using your device’s native camera app is the easiest way to get around the mirrored image issue. I made some instructions if you’re interested.
Mac/Windows Users: https://docs.google.com/document/d/1s16N4FoEQ_DFEjzLxx9CxhO5P1dQm1aPkeYrS0ya_cc/edit?usp=sharing
Chromebook Users:
https://docs.google.com/document/d/1tx-j6YojsqS5wIl_LEJfeHcL7rbSuQ4iJdSaOOghhnI/edit?usp=sharing
LikeLike
Wonderful, thank you Dan! Yes, I agree, it’s the easiest to do and to teach others to do.
LikeLike
Regarding your great instructions, I will say that I am able to see the camera in both applications at once. Photobooth and zoom can see the camera view simultaneously. When I use a third party app like ManyCam, or Ipevo, they can also be used with zoom, seeing the camera simultaneously.
LikeLike
Hi John
Brilliant idea! Currently I teach Design Technology skills remotely but don’t have access to a 3D printer or laser cutter. Is there any way I can buy one of these pre-made? TIA!
LikeLike
There is a product called Mirror Cam by Ipevo that they sell for a very reasonable price: https://www.ipevo.com/products/mirror-cam
LikeLike
That’s fantastic! Stay safe and stay well!
LikeLiked by 1 person
You as well!
LikeLike
I’m a bit pressed at the moment but look forward to reading your website…thanks again!
LikeLike
You can easily make this device. I think students from the 4h grade and up can easily make it. I made instructions on how you can make your own here: https://www.instructables.com/id/Make-a-Document-Camera-Out-of-an-Old-Box-and-a-Mir/
You will need to buy a $4 mirror. The link to the place that has the mirror is in the instructions.
LikeLiked by 1 person
Awesome idea John. I’ll suggest it to my students. A very quick and dirty idea for impatients is here: https://itp.tugraz.at/~arrigoni/vorlesungen/cdpocketcamera/cdpocketcamera.pdf
LikeLike
Love this! Thank you for sharing!
LikeLike
Dear Sir,
Thanks for sharing, It helps lot,
We laser cut few samples and 3D prints few numbers for our faculties and students.
it is like helping hand for user during this pandemic time, they are very happy by using it.
Thanks a lot.
– Soni Paresh,
Technical Instructor
Rapid Product development Lab
Design Vision Centre,
National Institute of Design,
Ahmedabad, India
e mail: soni@nid.edu
LikeLike
That is wonderful news. I am so glad it is helping your faculty and students. Thank you for sharing your experience with me.
LikeLike