
Introduction
For the past couple of months I have worked on a project that has actually been years in the making, at least in my mind. Year after year, I saved up a number of old Altoids mint tins, knowing that I would start a project with them some day. I didn’t know precisely what I wanted to do, but felt they had the potential to create an interesting work of art. They are sturdy in construction, have an “old-timey” rustic look and feel, and could be designed to represent a window into another world.
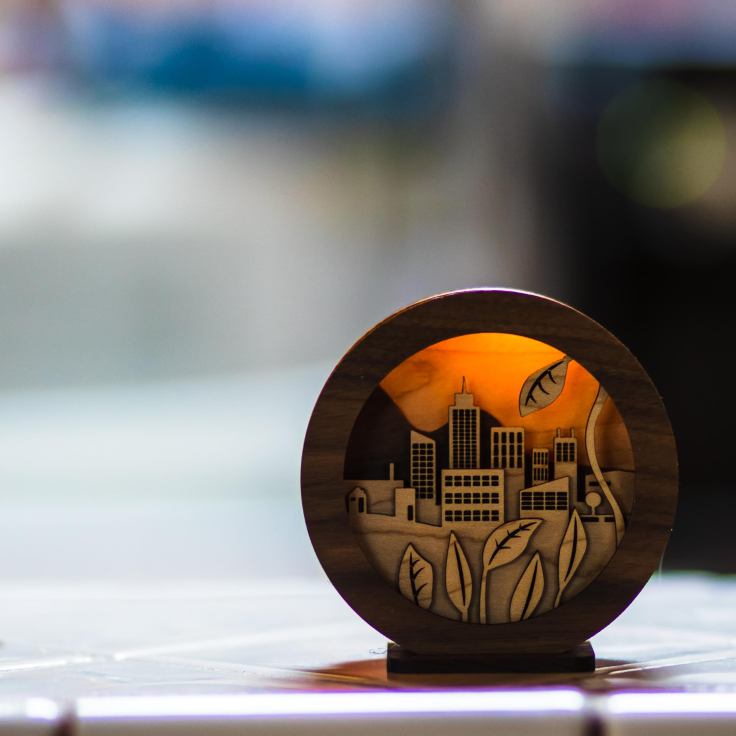
With all of this in mind, the idea came to me to design and laser cut miniature wooden landscapes into these empty mint boxes, and to embed LED lighting to bring emotion, mood, or a sense of serenity to the scene. I could use the lids as a portal through which to view the micro landscape.
The Artwork
Working in Adobe Illustrator, I created a few initial designs. I began with a simple mountain landscape with trees and log cabin in the foreground. Quick google searches for “landscape graphics” gave me inspiration. I moved on to a desert landscape, and then a cityscape. I continue to consider new designs, and future projects may involve cityscapes from well-known real locations (Los Angeles, New York, Mexico City) or representations of other world landmarks (the Grand Canyon, Mount Everest, Half Dome).

The Tools
I use a Glowforge to engrave and cut the wood pieces, a soldering iron for wiring the LED and battery circuit, and a hot glue gun for assembly of components. I also apply wood glue in places where wood on wood connections are necessary. I use a pocket knife and these Fiskar snips for cutting the tin.
The Materials
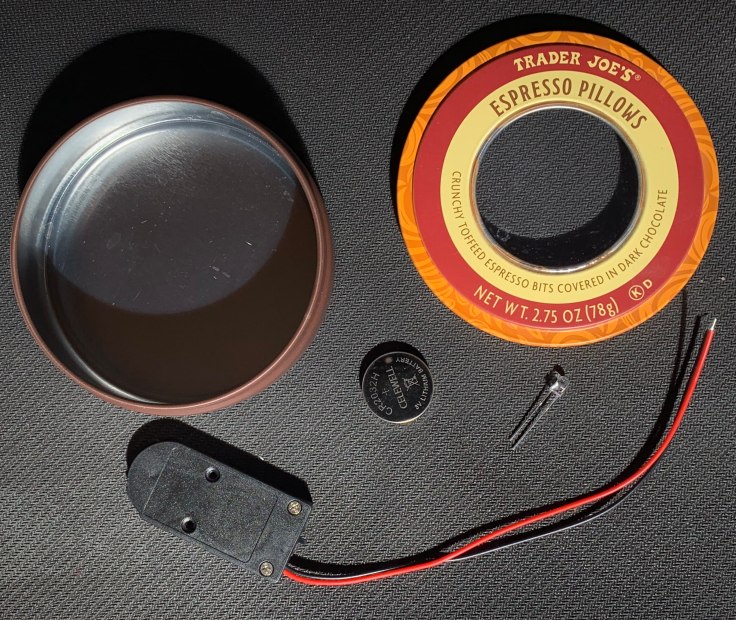
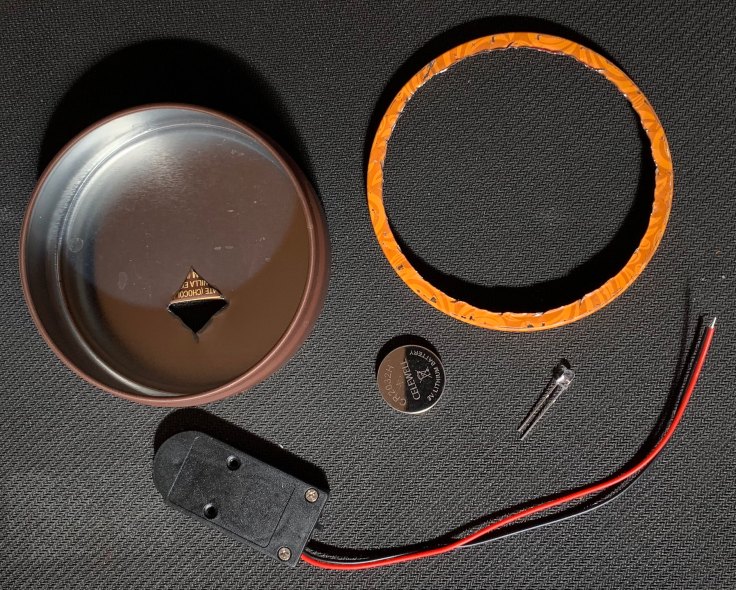
In addition to the mint box, I purchased 1/8” inch thick proofgrade maple and walnut wood from Glowforge, CR2032 coin cell batteries, various 3mm LEDs and coin cell battery holders from Amazon with a built in switch.
The Process
With the artwork exported from Illustrator (I format as PDF), I place the pieces onto the Glowforge in the areas where I want to cut. In my most recent designs, I cut into maple and walnut, depending on which layer, or “slice,” of the landscape I am working with. In the example below, I used maple for the foreground, the city, and the sky. I used walnut for the mountains and the front frame.
Here are samples of the original layers when laid out and cut on the laser cutter.


To prepare the mint box, I cut out a window from the lid of the container. I leave a small border around the edge of the lid to glue on the laser cut front frame. I also cut out a small hole in the bottom of the box to feed in the LED and wires.
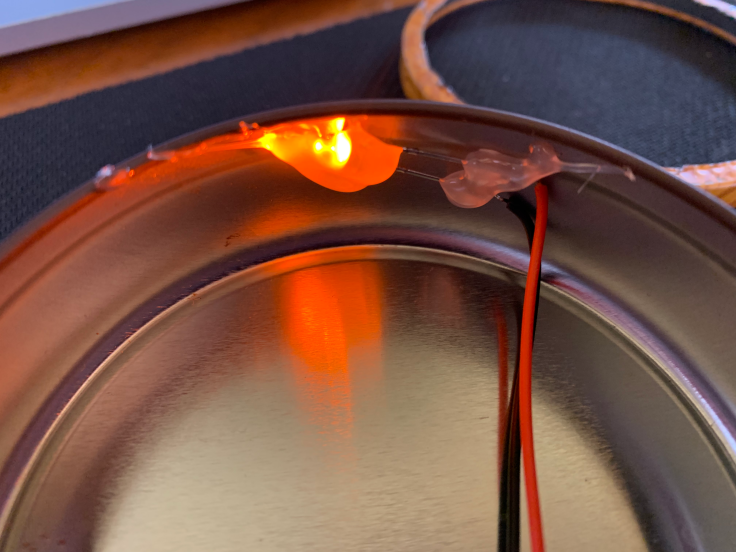
For the basic circuit, I solder the LED directly to the leads of the coin cell holder. This particular holder is designed to accommodate 6V, or two coin cell batteries. Since the LED requires just 3V, I insert one battery and connect the terminals where the second battery would otherwise go (which closes the circuit). There are other ways to go about this, like purchasing a single coin cell holder. I just couldn’t beat the price on these battery holders and thus don’t mind the small hack.
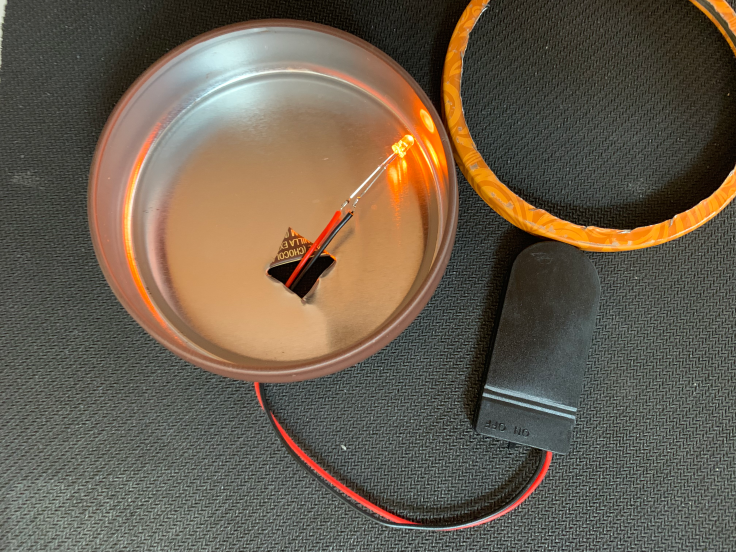
I position the circuit through the mint box from the back and hot glue the battery holder, wires, and LED into place. Each time I make one of these, I explore different options for placement of the light and the effect it has on the landscape components. I have also tested laser cut acrylic as one of my slices to enhance and spread the light, but haven’t found quite the right look yet. I hope to explore that option more in future versions.
To diffuse the light and provide a softer glow, I apply hot glue over the LED. (You can read this previous post for other creative ways to diffuse an LED.)
I often use spacers between the various layers of wood in the project in order to give some separation between parts of the landscape. For example, I might separate the city from the mountains, or the trees from the hills in the distance. I also use spacers on the deepest layer, closest to the rear of the box, to provide space for the wiring underneath.


In the final stage, I hot glue the lowest layer to the inside bottom of the mint box, insert all pieces and add wood glue where necessary between layers. I hot glue the front frame of wood to the lid. That completes the mint box miniature landscape.
The photos in this post reflect the latest mint box designs, but I believe it is important to note that I went through a number of iterations (both in design and in dimension) until I discovered what worked for me. I found this iterative process vital to generate design improvements, take time to reflect on current work, make adjustments, and test new versions repeatedly.
")
")
")
")
")
")

")
")
")
As mentioned above, I hope to test out additional materials, such as acrylic, to see how they interact with the light. New designs may include real world locations, or fictional scenes and characters from books and film. The possibilities are truly limitless.

These look great! I like the way the light glows through the thin wood. Where does the battery pack go? Inside or on the back? Do you paint the back or side of the tins?
LikeLike
Thank you. The battery pack is glued to the outside on the back. This is for a couple of reasons. You can reach the switch easily and it doesn’t take up space on the inside of the tin. I actually don’t paint anything. I wanted to leave everything in its original form, so one would know what it is by looking at it. Considered airbrushing some internal pieces, and may do that at some point to give a different flavor to the project.
LikeLike
Cool. Would a AAA battery pack be too big? (Their advantage is that they are rechargeable.)
I recently saw another take on reusing mint tins. This crafter was making wool felted scenes on the inside with some story text on the outside. Your take makes me think of 3d printed lithophanes we’ve been trying to produce. Your lighting technique would make the backlit light source become part of the project.
LikeLike
So two AAA batteries would give you 3V or a little less if using rechargeable versions. I think you would need to add a resistor as a safe way to ensure proper current. Coin cell batteries have built in resistance. A google search for “AAA to power LED” would provide the right info. Good luck!
LikeLike
You were one of my teacher back in 93 at Lennox Middle School. Never forgot the Architectural models you had us do out of carboard or the days you used to bring in your computer to class with the talking parrot program. I’m 40 now, time flies fast.
LikeLike
Oh my goodness, this just brought a huge smile to my face this morning. I remember those days like they were yesterday. The architecture unit was one the most enjoyable for me, to see what you all created and built. I am still in touch with many people in Lennox, some very close friends still teach there. It will always be a special place for me. I hope you are doing well, please share your name if you can. All the best to you and thank you for reaching out. I am also so curious how you found this article? Take care.
LikeLike